Transforming your home into a celebration haven doesn’t have to be an extravagant affair. Simple birthday decoration at home can work wonders, turning a familiar space into an enchanting party zone. Whether it’s a sprinkle of confetti, the charm of balloons, or a homemade banner, these touches create memories without breaking the bank.
From easy birthday decoration ideas that weave in the thrill of DIY to affordable ideas that sparkle, this guide unravels the magic behind a festive home birthday. Embrace your inner party planner and dive into these simple birthday party decoration at home strategies designed to deliver joy and festive flair.
1. First Impression is the Last Impression
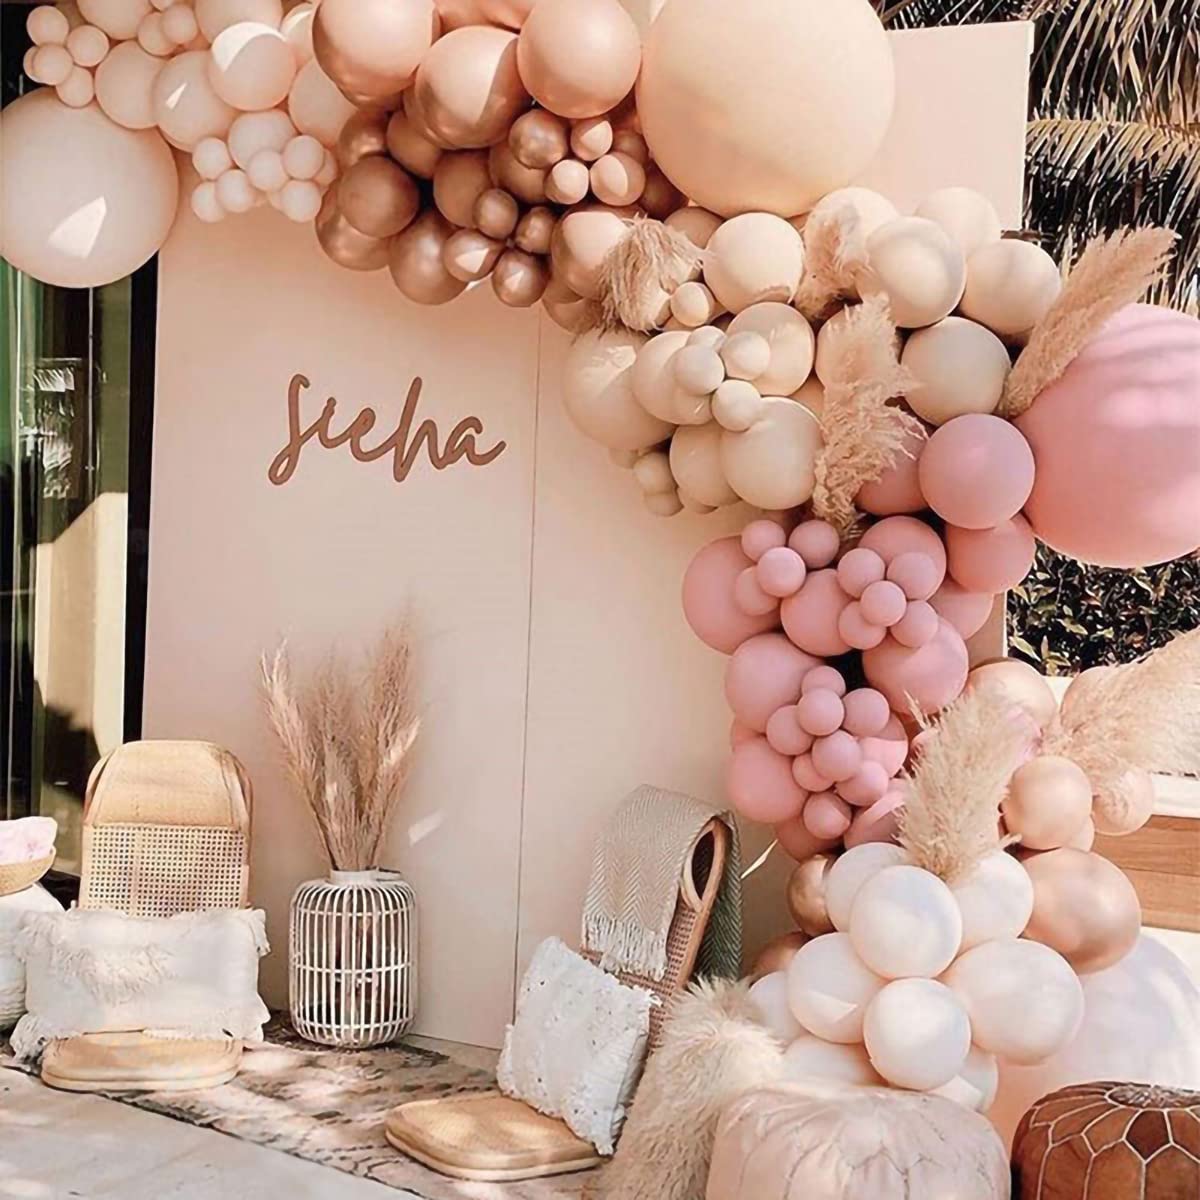
As guests step through your door, let the party’s pulse be felt immediately with a dazzling display of balloons that sets the celebratory mood. A well-chosen color scheme and a plethora of balloons beckon with the promise of fun and festivity. Here’s how to ensure your balloon decor makes a lasting impression:
Color Scheme and Balloon Variety:
- Select a color palette that resonates with the birthday theme or the guest of honor’s favorite hues.
- Mix and match balloons of different sizes and shapes for a dynamic visual effect.
- Consider using a gradation of colors or contrasting hues for a striking transition on your balloon wall.
Creating the Balloon Masterpiece:
- Balloon arches and garlands add a touch of whimsy and can be crafted with or without a stand for flexibility.
- Incorporate themed balloons shaped like favorite characters or numbers to mark a milestone birthday.
- Use adhesive strips or removable hooks to attach balloons to walls, ensuring easy removal post-celebration.
Setting the Stage for Memories:
- Designate a balloon backdrop area for guests to snap vibrant photos and videos.
- Add metallic or mother-of-pearl shades for an elegant touch, or go bold with fantasy creatures for a playful vibe.
- Ensure the balloon arrangements are securely fastened to prevent any party poppers from deflating the fun.
As the balloons float high, so too should the spirits of your attendees. With pathways cleared, the lawn neatly trimmed, and the front door freshly painted, the path to your home sets the tone for what lies within. Inside, a clutter-free space with strategic lighting and fresh flowers breathes life into the celebration. Remember, it’s not just about the decorations but the entire sensory experience that forms the first—and lasting—impression.
2. Make The Walls Balloony
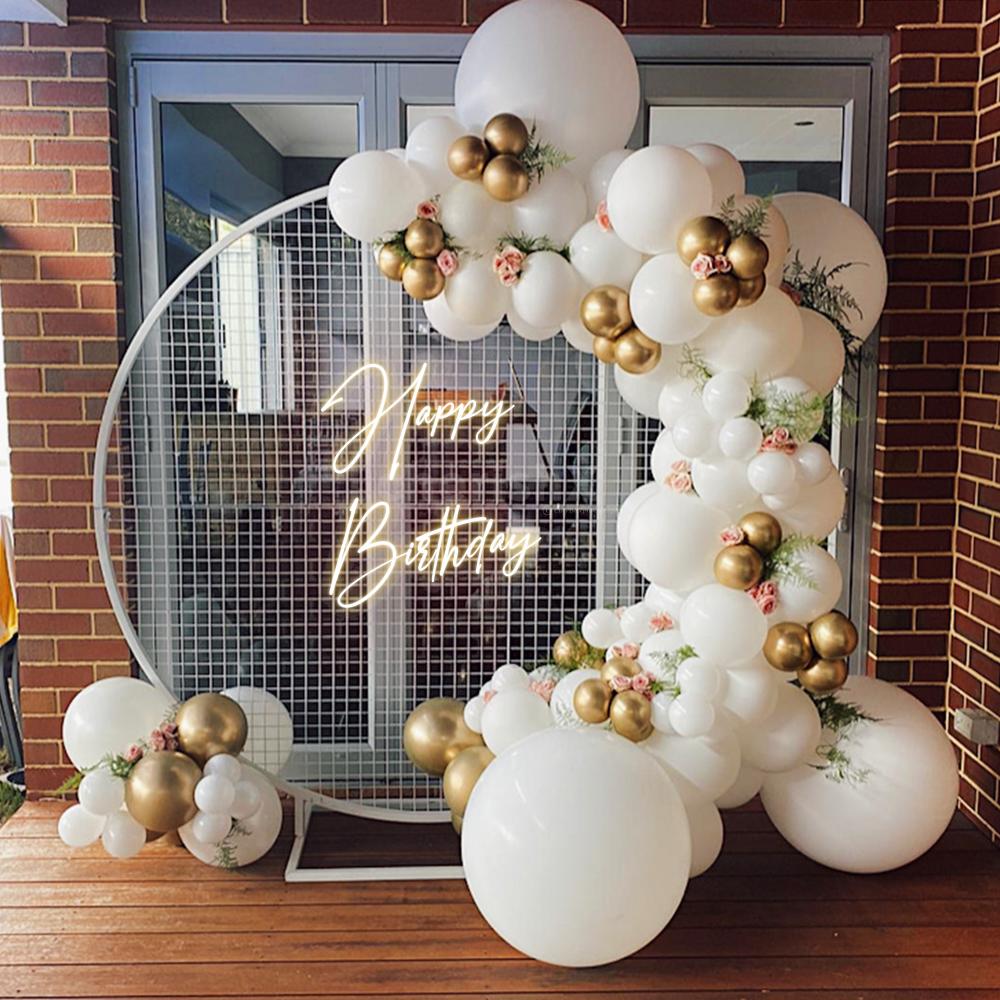
Elevate the party atmosphere by creating your very own DIY balloon garlands, a delightful addition that can transform any room into a festive celebration space. Here’s how to fashion these floating beauties into a captivating display:
Crafting Your Balloon Garland:
- Gather Your Supplies: You’ll need a variety of balloons in different sizes and colors that match your party theme, a balloon pump, clear fishing line or string, and adhesive hooks or tape.
- Inflate Balloons: Use a hand or electric pump to blow up the balloons, keeping a mix of sizes for a whimsical look.
- Create Balloon Clusters: Tie inflated balloons together in clusters of 3-5, mixing colors and sizes for a textured effect.
Assembling the Garland:
- String It Up: Take a long piece of fishing line and begin tying your balloon clusters to it, ensuring they are snug and secure.
- Vary the Pattern: Alternate the direction of the clusters as you add them to the string, creating a dynamic and full garland.
- Fill in Gaps: Once the main structure is in place, add individual balloons where needed to create a lush, overflowing look.
Displaying Your Masterpiece:
- Backdrop Beauty: Hang the garland against a wall to serve as a vibrant backdrop for the cake table or photo area.
- Entrance Enchantment: Drape the garland across the entryway to wow guests as they arrive, creating an archway of color.
- Table Trim: Swag the garland along the edges of tables, or suspend it above to frame the party space.
With these simple steps, your home will soon boast a blooming balloon spectacle that’s sure to spark joy and wonder in the hearts of all who enter. Let the balloons be the brush and your home the canvas as you paint an unforgettable birthday bash.
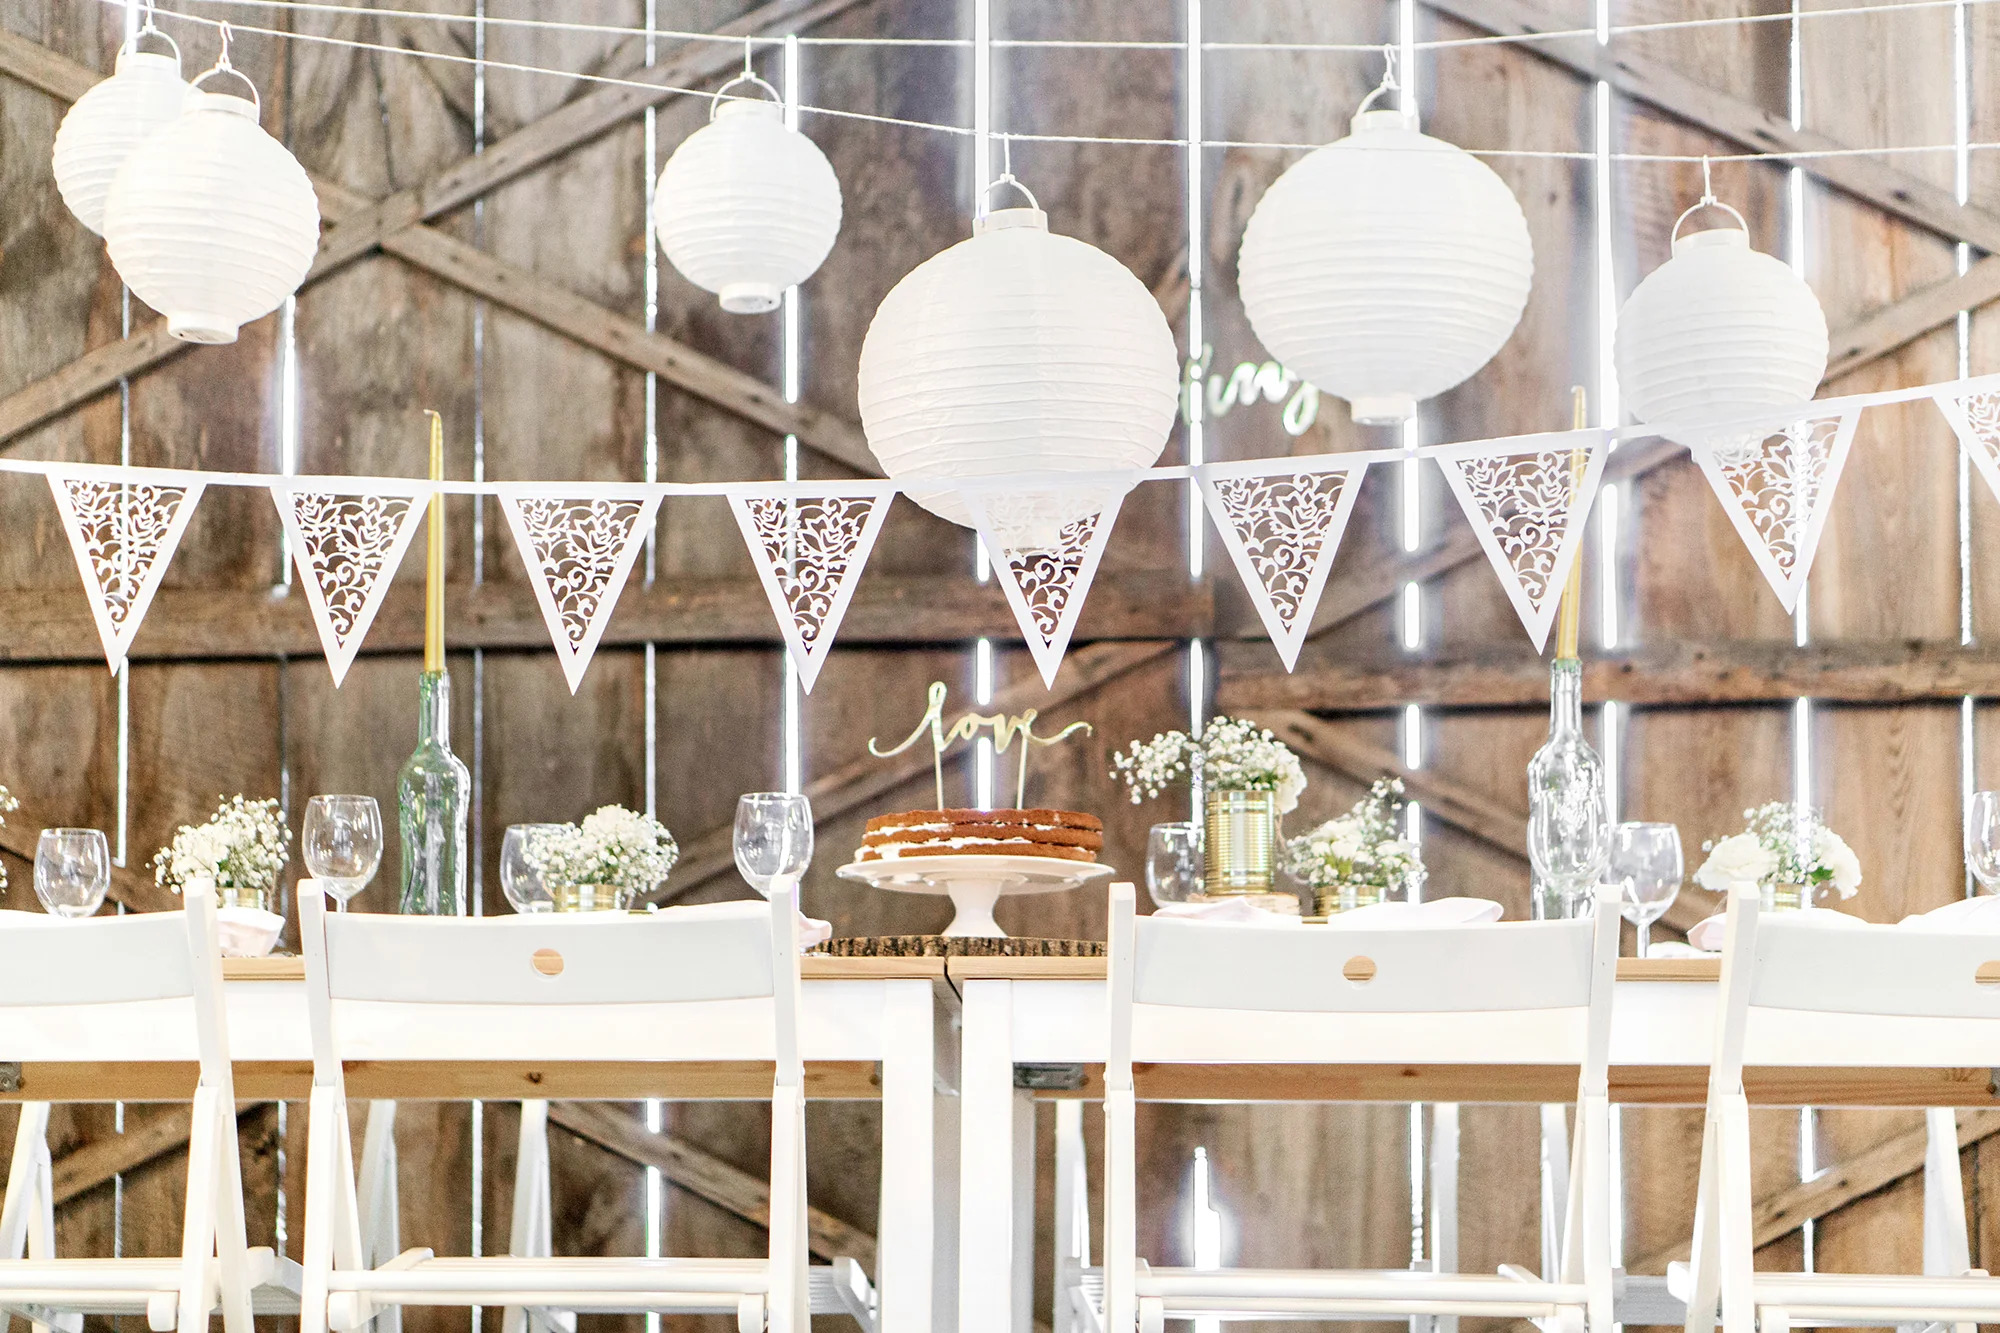
3. Birthday Banner Is A Must
A birthday bash without a banner is like a cake without candles – it simply doesn’t spark the same delight! A banner serves as the centerpiece of your party décor, eloquently shouting out the celebratory message. Let’s dive into the world of banners, where the possibilities are as limitless as your imagination:
- Themed Banners: From the elegance of a Ballet Birthday to the spooky allure of a Nightmare Before Christmas theme, select a banner that complements your chosen motif. Themes can range from the dainty twirls of ballet dancers to the iconic silhouettes of Jack and Sally, catering to every age and fancy.
- Personalization: Nothing says special like seeing your name on a banner. It’s a simple touch that adds a huge smile, so consider customizing the banner with the birthday person’s name. Whether they’re a fan of Minnie Mouse or a Halloween enthusiast, seeing their name amidst their favorite themes will make their day unforgettable.
- Eco-Friendly and Reusable: Celebrate sustainably by opting for banners made from reusable or eco-friendly materials. Not only do they add a touch of responsibility to the revelry, but they can also be repurposed for future celebrations.
Creating your own banner can be a joyous and bonding activity. Here’s a simple DIY guide inspired by Hinal’s Creation on YouTube:
- Materials Needed:
- Cardstock or foam sheets for sturdy letters
- Ribbons or strings to connect the letters
- Scissors and glue for assembly
- Design templates for precise letter shapes
- Assemble Your Banner:
- Cut out the letters using the chosen templates.
- Glue each letter to a piece of ribbon or string.
- Allow for drying time to ensure they’re securely attached.
- Customization Tips:
- Add a personal touch with funny or sentimental messages.
- Embellish with decorative elements like small flags, paper shapes, or even light balloons for extra flair.
- Match the banner style with the party’s color scheme or theme for a cohesive look.
With a crafting time of about 5 minutes per letter, you can create a unique banner that’s both heartwarming and a feast for the eyes. And don’t shy away from experimenting – with over 50+ ideas involving various materials and techniques, your banner can become a standout piece. Imagine a chalkboard banner where guests can leave birthday messages, or a garland of tassels and colored paper that dances in the breeze.
The beauty of DIY banners lies in their versatility. Whether you’re stitching together a fabric banner, assembling a photo montage, or printing a Pantone postcard collection, each style has its own charm. And for those who revel in ‘lazy crafting,’ remember it’s all about the joy of creating, not the pursuit of perfection. So, grab your materials and let the banner become the herald of happiness at your simple birthday decoration at home.
4. Paper Garlands For a Bloomy Birthday
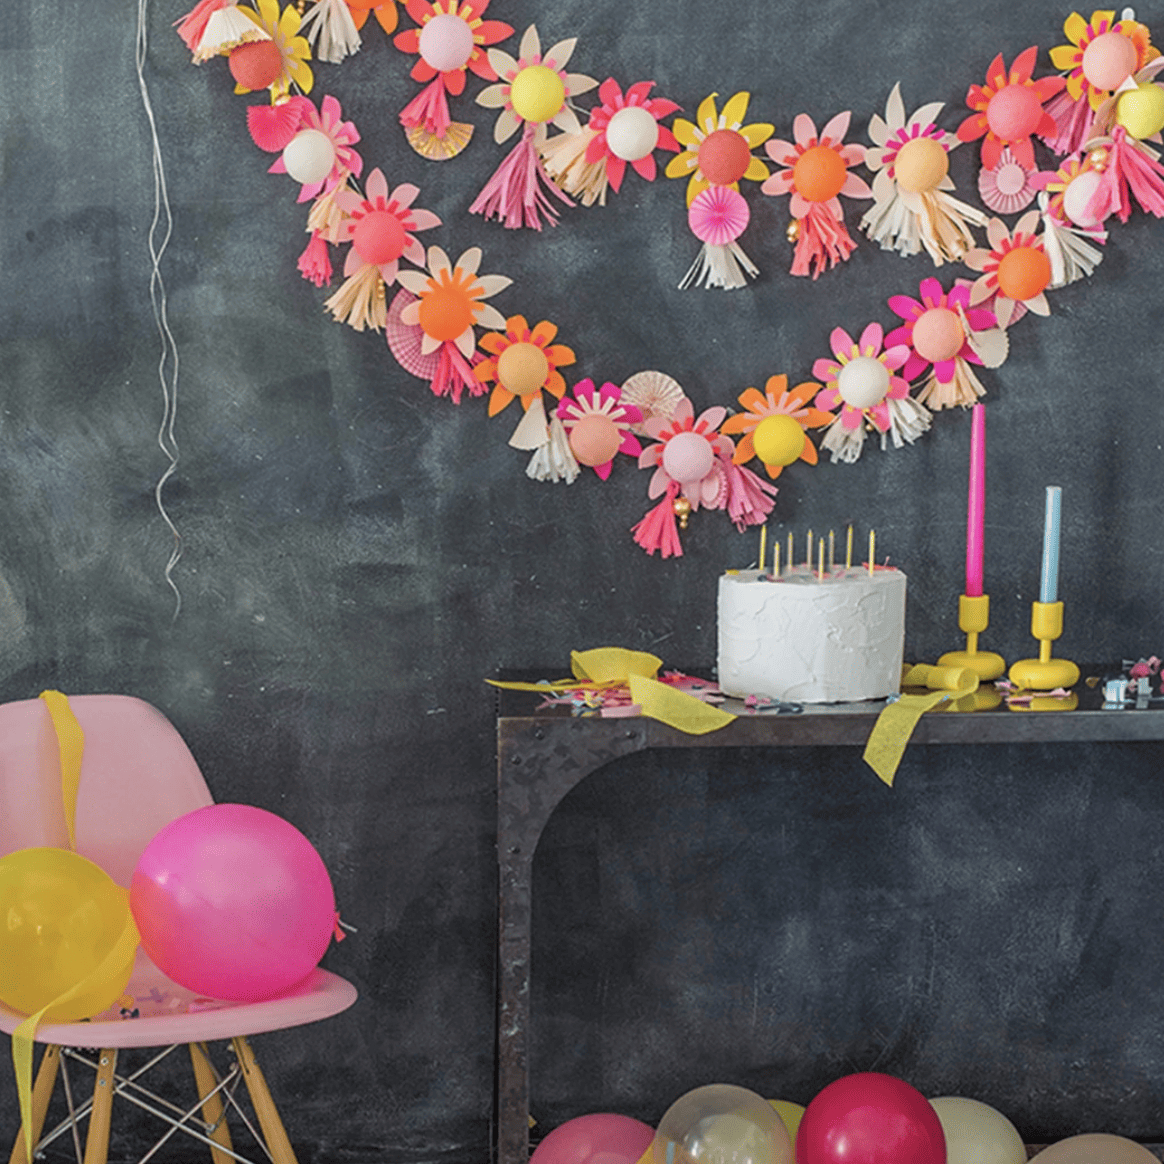
Dive into the delightful world of DIY with paper garlands that promise to sprinkle your birthday bash with whimsy and wonder. These simple yet splendid decorations are the secret ingredient for a bloomy birthday ambiance. Here’s how you can create these enchanting adornments:
DIY Paper Leaf String Light Garland:
- Time Investment: Approximately 1 hour.
- Materials: Hand-cut green leaves, battery-operated string lights.
- Process: Intertwine the leaves with the lights for a magical glow that brings your space to life.
10 DIY Paper Garland Ideas:
- DIY Paper Geode Garland by Lia Griffith:
- Aesthetic: Earthy and eye-catching.
- Materials: Paper geodes, twine.
- Special Touch: Downloadable template for uniformity.
- Loopy-Loo Garland by Melissa Esplin:
- Aesthetic: Simple and playful.
- Materials: Paper strips, ribbon.
- Quick Craft: Easy to produce in bulk for a grand effect.
- Woven Paper Balls Garland by How About Orange:
- Aesthetic: Textured and dynamic.
- Materials: Any paper type.
- Customizable: Mix and match colors for a personalized look.
- 3D Paper Circle Garland by yes! we made this:
- Aesthetic: Modern and versatile.
- Materials: Paper circles, thread.
- Occasion-Ready: Perfect for any celebratory event.
- Paper Ice Cream Banner by Bugaboo City:
- Aesthetic: Summery and sweet.
- Materials: Paper crafted into ice cream cones.
- Ideal Setting: Summer garden parties.
- Spring Paper Flower Garland by Lia Griffith:
- Aesthetic: Delicate and floral.
- Materials: Precision-cut paper flowers.
- Skill Level: Requires careful crafting.
- Accordion Fold Paper Garland by Craftiments:
- Aesthetic: Nostalgic and charming.
- Materials: Folded paper.
- Storage-Friendly: Folds neatly when not in use.
- Paper Leaves Garland by Oh Oh Deco:
- Aesthetic: Tropical and lush.
- Materials: Paper leaves.
- Theme: Perfect for summer or jungle-themed decor.
- Curly Q DIY by Michelle Edgemont:
- Aesthetic: Spirited and fun.
- Materials: Curled paper strips.
- Bonus: Create matching accessories for a unified theme.
- Rainbow Fan Garland by Ice Cream Off Paper Plates:
- Aesthetic: Colorful and cheerful.
- Materials: Paper fans.
- Backdrop Potential: A vibrant photo booth background.
Three Methods to Create Paper Garlands:
- No-Sew Paper Garland:
- Technique: Glue paper strips into loops and hang.
- Placement: Nail or push pin for easy display.
- Circular Paper Garland:
- Technique: Sew cardstock circles together and hang.
- Placement: Push pin or double-sided tape for a floating effect.
- Tissue Paper Garland:
- Technique: Thread tissue paper circles for a soft texture.
- Placement: Adorn a wall or doorway for a festive touch.
Step-by-Step Guide to Making Paper Garlands:
- Materials: Colored or patterned paper/cardstock, scissors, hole punch, string/twine, ruler, pencil.
- Steps:
- Cut paper into rectangles.
- Draw desired shapes on each rectangle.
- Cut out the shapes.
- Punch holes at the top of each shape.
- Thread string through the holes.
- Space shapes evenly using a ruler.
- Secure shapes by tying knots on the string.
- Hang your garland to add a pop of joy to your celebration.
From the Sweet Burlap and Doily Banner to the Pretty DIY Geode Paper Garland, the options are endless. Explore other craft ideas like the candy garland or the crepe paper garland with fringe from the blog “Pink Stripey Socks” for an even wider array of festive flair. And for a touch of vintage charm, consider the old book page garland, a testament to the timeless joy of turning pages into party decor.
5. Say Cheese
As the festive balloons sway and the paper garlands flutter, imagine the delight of capturing these moments at a DIY photo booth. It’s the perfect spot for guests to say ‘cheese’ and take home a snapshot of joy. Here’s how to create that picture-perfect corner:
Setting Up the Camera and Tripod:
- Camera: A digital point-and-shoot camera is just the ticket for easy operation.
- Tripod: Essential for keeping the camera steady at eye level, so every grin is in the frame.
Lighting and Backdrop:
- Lighting: Illuminate your subjects with good lighting to ensure every photo is professional-quality. Consider soft box lights or ring lights for that flattering glow.
- Backdrop Ideas:
- Printed fabric for a custom theme.
- Black foam board for a classic look.
- Dipped coffee filters for a textured, whimsical background.
- Kraft paper with hand-painted designs for a personal artistic touch.
Props and Backdrop Size:
- Props: Gather an array of items to inspire fun poses:
- Personal keepsakes to make it intimate.
- Thrift store finds for a dash of quirky charm.
- Vintage shop treasures to travel back in time.
- Theme your props to match the era or vibe of the party.
- Backdrop Dimensions: Aim for at least 5 feet across and 3 to 4 feet tall to comfortably frame 3 to 5 people.
Prop Station and Instructions:
- Set up a prop station with a signboard that guides guests:
- Clearly display props for easy access.
- Include simple instructions for a smooth photo-taking process.
Tech-Savvy Photo Booth Options:
- Apps and Delivery: Employ a professional photo booth app like Simple Booth HALO® for digital props and filters, with options for print or digital photo delivery.
- Testing: Always test your setup before the party to ensure a hassle-free experience.
Creative Camera Choices:
- Polaroid Camera: For instant prints that guests can take away as mementos.
- Selfie Station: Set up a smartphone on a tripod for quick and easy selfies.
- DSLR Camera: If available, use it for the highest quality images.
Engagement and Sharing:
- Encourage guests to share their fun moments:
- Create a unique hashtag for the event.
- Use a dedicated photo booth app to compile all the memories.
Tropical Photo Backdrop:
- Materials: Hibiscus flowers, green foliage.
- Setting: Craft a lush, tropical scene for guests to strike their best poses.
By following these steps, you’ll have a DIY photo booth that’s not just a corner but a centerpiece, where laughter is captured and memories are made tangible. So, ready the props and adjust the lights—it’s time to create snapshots that will be treasured for years to come.
6. Pom Pom Magic
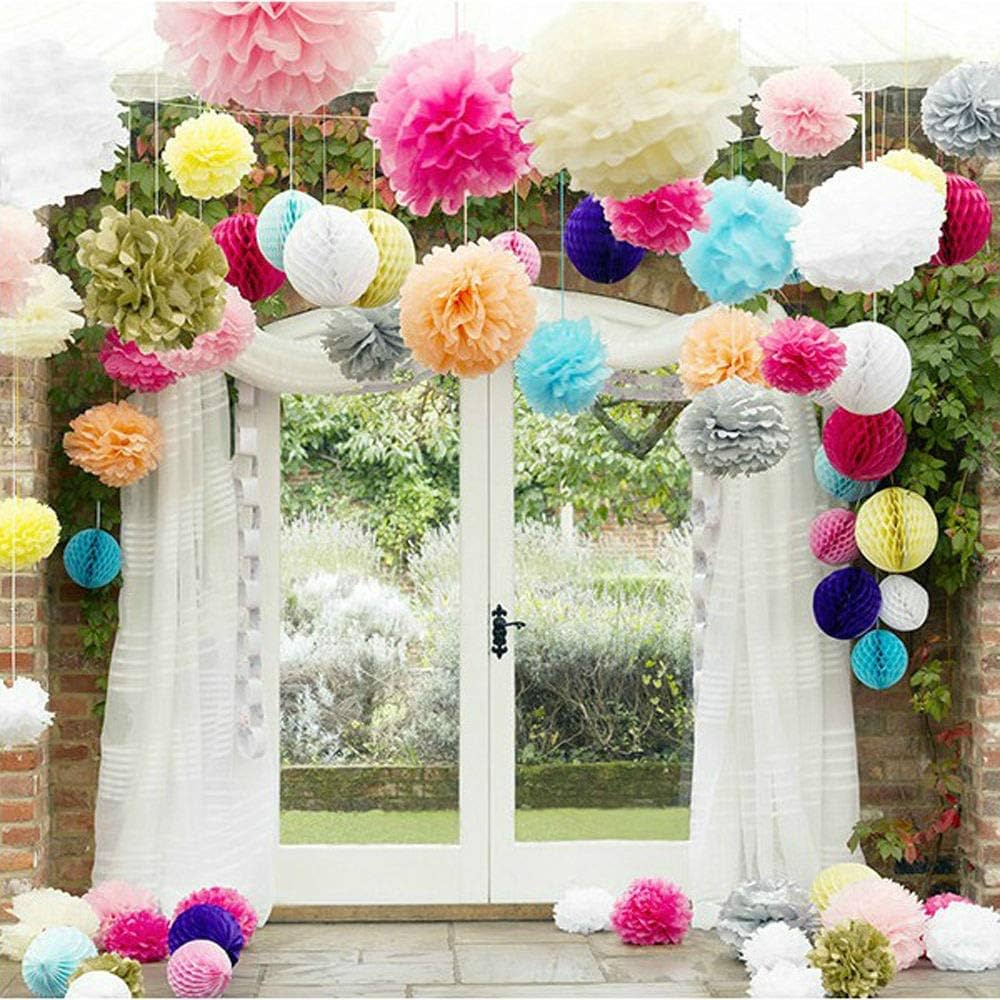
Add a dash of whimsical charm to your celebration with the delightful fluff of tissue paper pom-poms! These versatile decorations can be crafted to suit any event, from a vibrant birthday bash to an elegant bridal shower. Here’s how you can create your own pom-pom paradise:
DIY Tissue Paper Pom-Poms:
- Materials: Tissue paper, floral wire, scissors.
- Time Investment: About 15 minutes per pom-pom.
- Cost: Estimated $5-$10 for materials.
Creating Different Sizes:
- Oversized Pom-Poms: Perfect for hanging from the ceiling, creating a dramatic effect.
- Medium Pom-Poms: Ideal for stringing together as a garland or a mobile.
- Small Pom-Poms: Great for adorning tabletops or as part of a napkin ring ensemble.
Step-by-Step Crafting:
- Stack and Fold: Begin with multiple layers of tissue paper and fold them back and forth in 2-inch pleats.
- Secure the Center: Wrap a wire loop around the middle of the folded paper to hold the pleats together.
- Fluff and Shape: Carefully pull apart the layers, separating them to form a full and fluffy sphere.
For those eager to dive deeper into the pom-pom crafting world, Martha Stewart’s website is a treasure trove of inspiration, offering a tutorial that extends the pom-pom magic to creating coordinating napkin rings. Meanwhile, FancyBloom’s “Tissue Paper Pom Poms DIY” collection on Pinterest provides 37 pins bursting with paper flower templates, tutorials, and DIY paper craft ideas to fuel your creativity.
Budget-Friendly Options:
- Pre-Made Pom-Poms: For those short on time, purchasing pre-made pom-poms can be an affordable option, like the “10pcs Decorative Paper Flower” for $4.60.
- Bulk Buying: Gather friends and buy materials in bulk to save on costs and share the crafting fun.
Tissue paper pom-poms are not only a feast for the eyes but also a versatile decoration that can be tailored to fit a myriad of themes and celebrations. Whether it’s a home birthday, a wedding, or a holiday gathering, these puffy delights are sure to add a burst of joy and color to your special event. So gather your materials, and let the pom-pom crafting begin!
7. Polaroid Wall
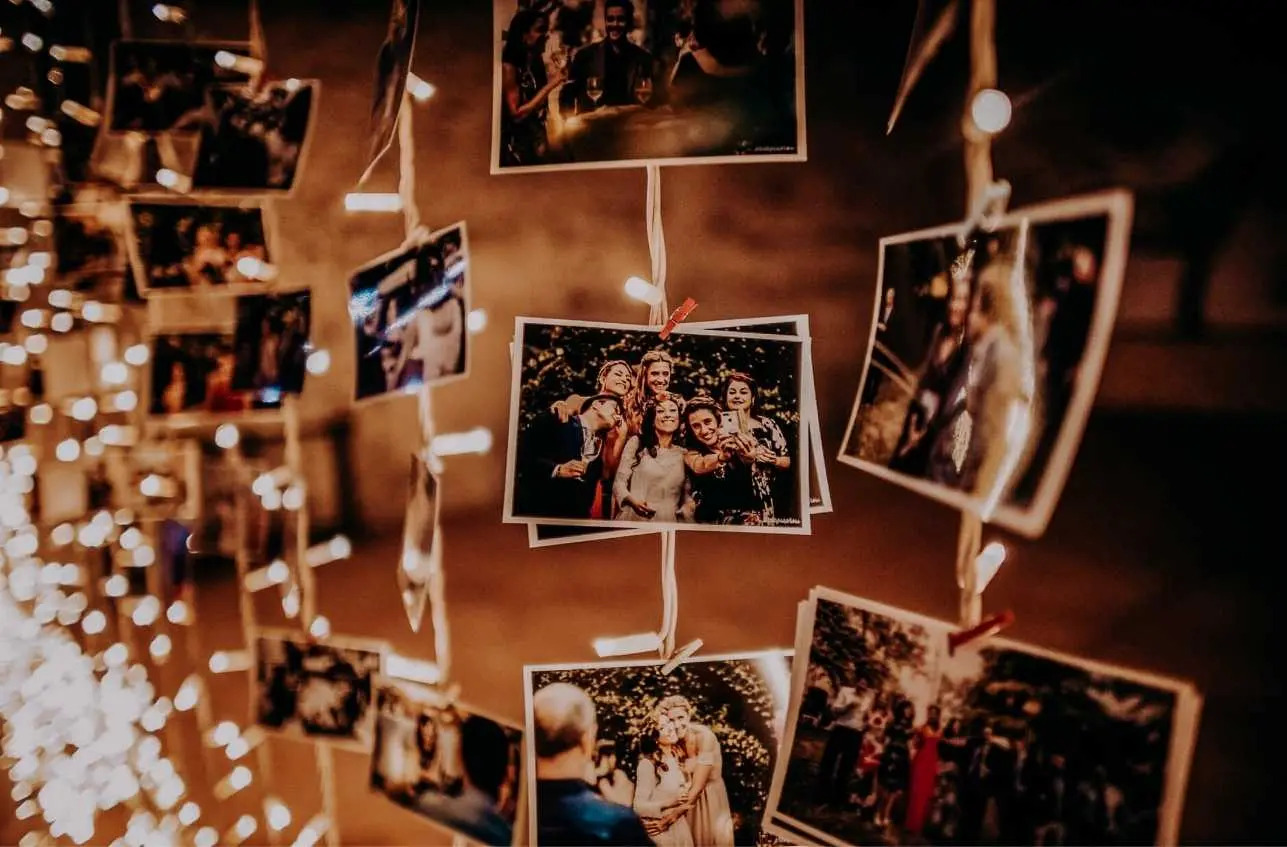
Imagine stepping into a room and being greeted by a wall that’s not just a wall, but a canvas of memories—a Polaroid Wall. This throwback trend is making a huge comeback, capturing the hearts of party-goers and Instagram enthusiasts alike. It’s the quintessential blend of nostalgia and modern DIY savvy, perfect for adding a personal touch to birthdays, bridal showers, and other special occasions.
Building Your Own Polaroid Frame Photobooth:
- Materials You’ll Need:
- Underlayment plywood or PVC pipes for the frame
- Minwax Jacobean Stain or paint of choice for a polished look
- Vinyl decals for personalization
- Copper pipes or PVC alternatives for a sturdy structure
- Wire or string to attach the frame to the stand
- The Construction Process:
- Design the Frame: Use software like Picmonkey or Canva to create custom lettering and print it out.
- Cut and Stain: Shape the plywood into a frame and apply the stain for a vintage feel.
- Assemble the Stand: Solder copper pipes or fit PVC pieces to form the base and stand.
- Combine Elements: Secure the frame to the stand using wire or string, ensuring it’s strong enough to withstand the excitement of the day.
- Final Touches:
- Ensure the photo booth is approximately 5 feet wide and 7 feet tall, with a depth of 2 feet at the base for stability.
- Place on a flat surface, leaving ample room for a camera tripod and guest movement.
- Test with both DSLR cameras and smartphones to guarantee a picture-perfect experience.
Creating a Polaroid Wall Display:
- Printing the Memories:
- Crop digital photos to a square shape, considering a black and white filter for a classic look.
- Print on A4 printer paper or card for a crisp image.
- Arranging the Display:
- Organize the photos in a 5 x 3 grid, each capturing a moment of joy.
- Accent with gold lettering or numbers for a touch of elegance.
- Surround with gold-wrapped gifts to enhance the celebratory atmosphere.
Inspiration for a Themed Party:
- Throwback to the Birth Year: A Polaroid Themed 30th Birthday Party taps into the #tbt trend, paying homage to retro years.
- Decor Elements:
- Use floating balloons to display Polaroid-style photos, creating a hovering gallery of smiles.
- Print 4×4 glossy prints economically at stores like Walmart, ensuring the trip down memory lane is as affordable as it is charming.
The Polaroid Wall isn’t just a decoration; it’s a storytelling masterpiece that invites guests to be a part of the narrative. With each snapshot affixed to the wall, the story of the celebration unfolds—a collage of moments that will be cherished long after the last balloon deflates.
8. Illuminating Foliage
Illuminating your home with fairy lights intertwined with lush foliage can whisk your guests away to an otherworldly realm, perfect for themes that call for a touch of magic like Quinceaneras or enchanting garden weddings. Here’s how to create that mesmerizing backdrop:
- Fairy Light Foliage Backdrop:
- Drape fairy lights behind a sheer curtain and layer with greenery for a soft, ethereal glow.
- Intertwine string lights with artificial ivy or Monstera leaves to fashion a verdant, twinkling wall.
- For a standout piece, arrange the 20 LED Monstera Leaf String Lights across a focal wall, priced at an accessible $13.99.
Transforming a simple birthday into a festival of lights is a breeze with a dash of creativity. Whether it’s outlining a princess’s palace or charting a pirate’s cove, here are some bright ideas:
- Themed Lighting Delights:
- Princess Party: Adorn doorways and tables with pink and white tulle, highlighted by pink mini lights for a royal ambiance.
- Pirate Adventure: Use orange or clear mini lights to illuminate a cardboard pirate ship or treasure chest, crafting a buccaneer’s den.
- Fiesta Fun: Circle a piñata with multi-colored mini lights, drape them in doorways, or wrap around cactus decorations for a vibrant fiesta.
- Sweet 16 Elegance: Decorate with pink and purple mini lights, accenting doorways, windows, and the iconic number ’16’ for a milestone celebration.
For a splash of color and an unexpected twist, consider these innovative lighting ideas:
- Colorful Illumination Hacks:
- LED Submersible Floralytes: Place these in various colors into beverage tubs for a submerged glow that dazzles.
- Paper Pineapple Lanterns: Safe and charming, these can be lit using battery-operated tea lights to bring a tropical zest to the party atmosphere.
By integrating these lighting tricks, you’ll not only illuminate your space but also give it a personality that resonates with the theme and excitement of the occasion. Let the lights twinkle and the foliage sway as you craft a celebration that shines bright in the memories of all your guests.
9. Movie Time
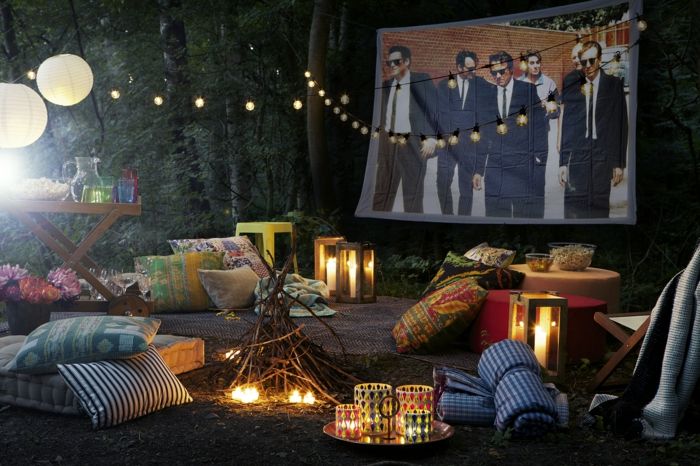
Roll out the red carpet and grab your DIY Hollywood-style tickets because it’s movie time! Transform your living room into a star-studded cinema or take the party outdoors for a magical movie night under the stars. Here’s how to set the scene for a blockbuster birthday bash:
Invitations and Virtual Set-Up:
- DIY Hollywood Tickets: Design and distribute glamorous movie ticket invites, complete with the birthday star’s name and party details.
- E-Invites for Virtual Attendees: Don’t leave out friends and family who can’t make it in person. Send out vibrant e-invites and set up a virtual watch party.
Theater Transformation:
- Indoor Glam: Drape backdrop curtains and add LED spotlights for that silver screen glow. Shiny metallic foil fringe curtains can add pizzazz to any room.
- Outdoor Cinema: For an al fresco film experience, hang a white sheet and position a projector. Add a red carpet or aisle runners to give guests the VIP treatment.
- Decor Details: Enhance the ambiance with themed banners and balloons to make everyone feel like a movie star.
Snack Concession Stand:
- Popcorn Paradise: Create a seasoning station for popcorn to let guests flavor their own snack just the way they like it.
- Candy Galore: Set up a concession stand brimming with beloved movie candies – think red licorice, chocolates, and gummies.
Selecting the Feature Film:
- Childhood Favorites: Take a trip down memory lane with a beloved classic from your childhood.
- Latest Hits: Keep it current with trending titles from Netflix or Disney+.
- Family & Friends’ Picks: Engage your guests by including their movie suggestions in a random name picker for a fun selection process.
Decor and Snack Tips:
- Popcorn Cupcakes: Visit TikkiDo.com for adorable and delectable popcorn cupcake recipes that double as decor.
- Cozy Viewing Area: Instead of stiff cinema seats, opt for a large sectional sofa, plush throw pillows, and chunky blankets for ultimate comfort.
Movie Marathon Ideas:
- Epic Series: Consider watching a series of movies, like the Marvel Cinematic Universe, to start a movie night tradition.
- Diverse Snack Menu: Offer a variety of snacks and finger foods – nachos, hot pretzels, mozzarella sticks, and chili dogs to keep the munchies at bay.
With these ideas, you’re all set to host an unforgettable movie night that will have guests talking long after the credits roll. Lights, camera, action – let the birthday movie magic begin!
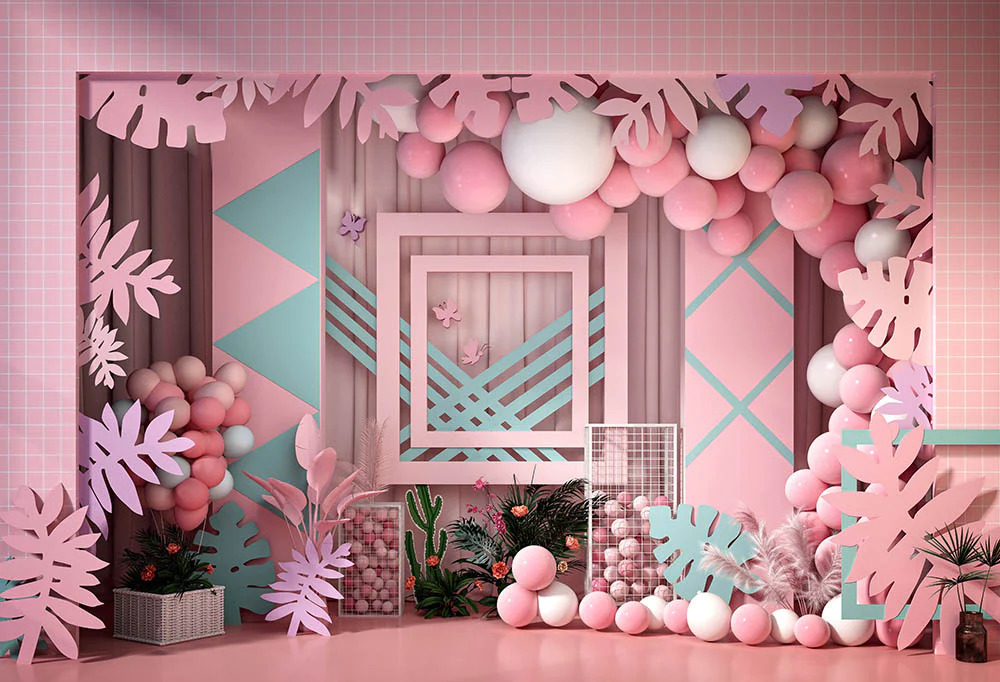
10. Beauti-pool Birthday Décor
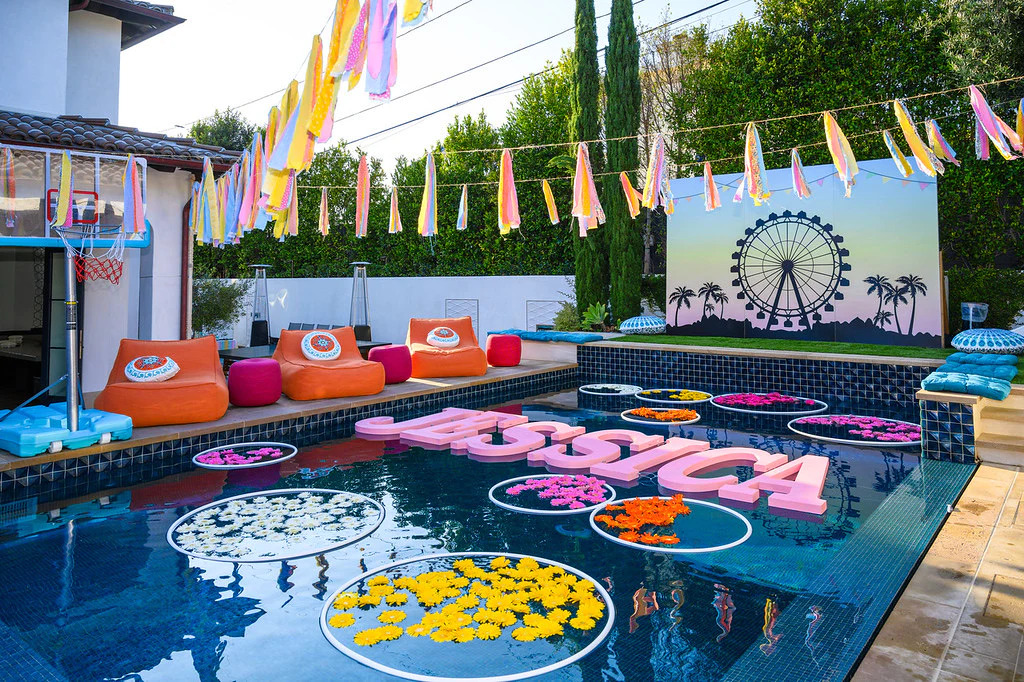
Dive into the splashy spirit of a beauti-pool birthday bash with these dazzling décor ideas that promise to make a splash!
Transform the Space with Streamers and Ribbons:
- Drape streamers from the ceiling to the pool deck, creating a canopy of color that dances in the breeze.
- Adorn doorways and outdoor structures with ribbons of varying lengths and textures, crafting a dynamic entrance that beckons guests to the aquatic fun.
Balloon Wonders:
- Pair helium balloons with DIY weights crafted from apples or oranges using ClarkRidge Co. Fruit & Pomander Hangers for an eco-friendly twist.
- Float a fleet of pool floats and balloons, from classic rings to trendy unicorns, adding a pop of fun to the water.
Festive Foliage and Flamingos:
- String up garlands shaped like jungle flora for a tropical vibe that transforms your backyard into an island paradise.
- Embrace a flamingo theme with pink decorations, including disposable silverware pockets that double as both practical and playful table accents.
Engaging Entertainment:
- Keep the energy high with poolside games like water balloon toss and pool noodle jousting, using budget-friendly finds from the dollar store.
- Set up a fire pit as the sun sets, inviting guests to cozy up with s’mores for a sweet end to the day’s festivities.
Refreshing Treats:
- Serve up frozen fruit popsicles and skewered grilled shrimp, perfect for nibbling as guests mingle and splash.
Set the Tone:
- Use vibrant decorations and a summer playlist to create an upbeat atmosphere that keeps the party going from day to night.
Themed Fun:
- Consider a Hawaiian luau or a nautical adventure with appropriate decor to match, ensuring every detail contributes to the immersive experience.
Memorable Takeaways:
- Send guests home with a slice of summer, gifting beach balls, sunglasses, or pool toys as a thank you for joining in the birthday revelry.
By incorporating these elements, you’ll create a poolside paradise that’s both enchanting and entertaining, ensuring your home birthday celebration is an unforgettable plunge into fun and festivity.
Conclusion
Crafting a memorable birthday celebration at home is all about the little details—from the flutter of paper garlands to the glow of fairy lights, every element comes together to create an ambiance of joy and excitement. Balloon garlands, whimsical pom-poms, and a personalized Polaroid wall not only set the scene but also invite guests to experience the magic. These simple touches ensure that the spirit of festivity permeates through every corner, making for an enchanting and unforgettable experience.
As the final streamers are hung and the candles on the cake flicker in anticipation, it’s clear that a heartfelt gathering has been orchestrated with creativity and care. For those seeking a seamless experience from start to finish, remember that help is just a click away; contact us at Venuelook.com for A-Z planning support that transforms your vision into a beautifully executed reality. With fond memories captured and bellies full of cake, guests will depart knowing they’ve been part of something truly special.
FAQs
Q. How can I create a simple birthday party decoration at home?
A. To create a simple birthday party decoration at home, you can hang balloons and tassels from the ceiling and place foil balloons that spell out “Happy Birthday” on the wall. Adding lights can also enhance the decorations by giving them a beautiful glow.
Q. What are the steps to organizing a simple birthday party at home?
A. When organizing a simple birthday party at home, follow this easy checklist:
- Decide on the guest list.
- Choose a date for the party.
- Schedule party activities.
- Create a master supply list for decorations and essentials.
- Purchase party favors for guests.
- Plan the menu, considering guests’ dietary preferences and allergies.
- Ask friends or family for help with preparations or during the party.
- Clean and prepare the house for your guests.
Q. What are some easy birthday decoration ideas?A. Here are some creative ideas to easily decorate for a birthday party:
- Create a balloon arch with a neon glow for a striking entrance or focal point.
- Set up a glittery backdrop for sparkling visual interest.
- Hang a personalized birthday banner to celebrate the guest of honor.
- Use hanging paper lanterns for a festive atmosphere.
- Set up a DIY photo booth with props for memorable photos.
- String fairy lights to add a magical touch to the space.
- Design customized centerpieces for tables.
- Utilize chalkboard signage for a personalized and rustic feel.
Q. How should I plan for birthday decorations?A. To plan for birthday decorations like a professional, consider the following steps:
- Choose an exciting theme for the birthday party.
- Set a budget for your decorations and overall party expenses.
- Use balloons and streamers as fun and classic decoration staples.
- Create a stylish table setting for your guests to enjoy their meals.
- Set the scene with an eye-catching backdrop or photo booth for pictures.
Book the best Decorators in your city, contact us at venuelook.com/decorators/delhi/vendors
For A-Z of your event requirements, contact us at Venuelook.com
You May Also Like:
- Cheers to Another Year: Unleashing the Fun in Adult Birthday Celebrations
- Fun Frolic Birthday Party Decoration Ideas!
- Ultimate Guide to Determine all Your Party Planning Needs
- 15 FUN Ideas to Celebrate Your Birthday as an Adult
- Party Ideas for a 40th Milestone Birthday Celebration!
- Kids’ Birthday Party Themes Suitable For Small Spaces
- 9 Princess Theme Decoration Items You Might Like To Buy!
- Birthday Party Themes For GIRLS – A Complete Guide for You!
- 10+ Best Frozen Theme Party Decoration Ideas and Supplies
- Best Way to Decorate a Room For a Theme Birthday Party
- Top 15 Birthday Themes for Girls
Have you sent out invitations for your upcoming event? If not, save paper and send free online invitations now.

Looking for a party venue? Browse and book best-suited party venues from VenueLook.com